2021年1月時点Next.jsのGraceful Shutdown実装状況調査

概要

Next.jsをコンテナで動かすときにGraceful Shutdownが実装されているか気になった。
12月の調査時点ではcanaryだったが、すでにリリースされていた。
本当は「2020年12月時点Next.jsのGraceful Shutdown実装状況調査」だったが、
今の状況だと「Next.jsにGraceful Shutdownが導入されたので挙動を確認する」とかでいい気がする。
ブログはすぐに書きましょう。

結果

下記リリースで導入された。
https://github.com/vercel/next.js/releases/tag/v10.0.4

Graceful Shutdown

コンテナの世界では外部からコンテナが落とされる事がよくある。
つまりdocker stop/killがよく実行される。
そのときアプリケーションにはSIGTERMやSIGKILLが送信される。
これらのシグナルを検知し、リソース(DBコネクション、FileIOなど)を開放して正常終了(exit code0)する必要がある。

c.f. https://www.ctl.io/developers/blog/post/gracefully-stopping-docker-containers/

(12月当時の)調査内容

  1. GitHubでSIGTERMを検索
  2. 該当コードをBLAMEしてコミットログ、PRを読む
    https://github.com/vercel/next.js/pull/19433

動作確認

v10.0.4

$./node_modules/.bin/next start
ready - started server on http://localhost:3000
# kill -15 <PID>
$echo $?
0

v10.0.3

$./node_modules/.bin/next start
ready - started server on http://localhost:3000
# kill -15 <PID>
Terminated: 15
$echo $?
143
変更に強いE2Eテストにするためにカスタムデータ属性を使う

概要

壊れやすいE2Eテストとは

E2Eテストのテストシナリオを書くときに、下記のようなセレクタの使い方をすると壊れやすくなる。

例:同じclass属性を持つ要素が増えたときにテストが通らなくなる。

例:ある要素の子の要素の子の要素のフォームにxxxを入力するなど
操作するセレクタに一つでも変更があるとテストが通らなくなる。

表示するテキストが変更されたときテストが通らなくなる。

例: <button>Sign in</button><button>Login</button>に変更されたときテストが通らなくなる。

カスタムデータ属性

それらを防ぐためにカスタムデータ属性を使う。
テスト用の属性を付与し、HTML、CSS、JSの変更から分離されたテストを書くことができる。
属性について画面と意味とユーザの行動を考えた名称をつける。
これにより、どのようなテストを実施しているかテストシナリオで表明できる。

まとめ

  • カスタムデータ属性を使って変更に強いE2Eテストを書く
  • テストシナリオはユーザの行動に即したシナリオを書いて仕様を表明する

参考

Making your UI tests resilient to change

Best Practices | Cypress Documentation

Element selectors | Playwright

data-* - HTML: HyperText Markup Language | MDN

Gitで削除された文字列のコミットとプルリクエストを調べる

概要

Gitで削除された箇所のコミットとGitHub上のPRを調べる。

環境

$git version
git version 2.26.0

結論

文字列からコミットを検索するには

$git log -p -S '<検索したい文字列>' <対象のコード>
#例 git log -p -S 'hoge' fuga.js 

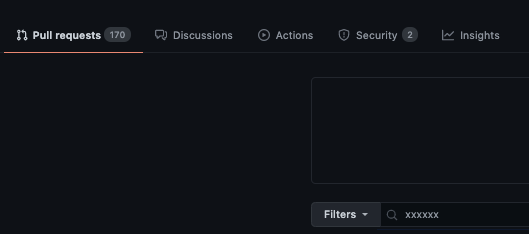
GitHub上でコミットハッシュからプルリクエストを調べるには、プルリクエストのサーチコンソールにコミットハッシュを入力する。 f:id:mMQnaZ7vL2DWkoU:20201214211542p:plain

git logのオプション解説リンク

https://git-scm.com/docs/git-log#Documentation/git-log.txt--Sltstringgt

https://git-scm.com/docs/git-log#Documentation/git-log.txt--p

https://git-scm.com/docs/git-log#_generating_patch_text_with_p

sedでcommand i expects \ followed by textが出た

環境

$sw_vers
ProductName:    Mac OS X
ProductVersion: 10.14.6
BuildVersion:   18G95

概要

sedを実行したら下記エラーが出た

$cat test.txt
1
2
3
#2行目にhogeを挿入
$cat test.txt | sed -e 2ihoge
command i expects \ followed by text

原因

Mac(BSD)とLinux(GNU)のsedの振る舞いが異なるため。
macos linux sedなどで調べると出てくる。

対応

gnu-sedを使う(BSD用の書き方もあるがLinux環境を考慮した。)

$brew install gnu-sed
$echo "alias sed='gsed'" >> .bashrc
$ source ~/.bashrc

Reactで孫のイベントで親のステートを変更する(コンポジションとコンテクスト)

目的

孫のイベントで親のステートを変更したい。

環境

  • Node.js v14.15.0
  • NPM v6.14.8
  • React v17.0.1
  • create-react-app v4.0.1

実装例

実装パターンを二通り試した。

コンポジションとは

https://reactjs.org/docs/composition-vs-inheritance.html
コンポジションと継承について、いくつかの例とともに書かれている。
https://reactjs.org/docs/context.html#before-you-use-context
contextを使う前にコンポジションを考慮しようと書かれている。

実装例

Parent.js

import { useState } from "react";
import { Child } from "./Child";
import { GrandChild } from "./GrandChild";

export const Parent = () => {
  const [count, setCount] = useState(0);
  const countUp = () => {
    setCount(count + 1);
  };
  const grandChild = (<GrandChild countUp={countUp}></GrandChild>)
  return (
    <div>
      <p>Parent component</p>
      <p>{count}</p>
        <Child grandChild={grandChild}></Child>
    </div>
  );
};

Child.js

export const Child = (props) => {
  return (
    <div>
      <p>Child component</p>
      {props.grandChild}
    </div>
  );
};

GrandChild.js

export const GrandChild = (props) => {
  return (
    <div>
      <p>GrandChild Component</p>
      <button onClick={props.countUp}>
        GrandChild Button
      </button>
    </div>
  );
};

コンテクストとは

https://reactjs.org/docs/context.html
コンテクストの概念について書かれている。
https://reactjs.org/docs/hooks-reference.html#usecontext
hooksで実装するパターンについて書かれている。

実装例

Parent.js

import { useState } from "react";
import { Child } from "./Child";
import { ClickEventContext } from "./hogeContext";

export const Parent = () => {
  const [count, setCount] = useState(0);
  const countUp = () => {
    setCount(count + 1);
  };
  return (
    <div>
      <p>Parent component</p>
      <p>{count}</p>
      <ClickEventContext.Provider value={{ onClickEvent: countUp }}>
        <Child></Child>
      </ClickEventContext.Provider>
    </div>
  );
};

Child.js

import { GrandChild } from "./GrandChild";

export const Child = () => {
  return (
    <div>
      <p>Child component</p>
      <GrandChild></GrandChild>
    </div>
  );
};

GrandChild.js

import { useContext } from "react";
import { ClickEventContext } from "./hogeContext";

export const GrandChild = () => {
  const clickEventContext = useContext(ClickEventContext)
  return (
    <div>
      <p>GrandChild Component</p>
      <button onClick={clickEventContext.onClickEvent}>GrandChild Button</button>
    </div>
  );
};

GrandChildのクリックイベント用コンテキスト
ClickEventContext.js

import { createContext } from "react";
export const ClickEventContext = createContext({ onClickEvent: () => {} });

まとめ

今回の用途ならContextAPIをせずコンポジションのほうが良いと判断した。

Context is designed to share data that can be considered “global” for a tree of React components, such as the current authenticated user, theme, or preferred language.

ローカル開発環境でプロキシサーバを構築しHTTP headerを利用する

前提

環境

Node.js 15x
Nginx 1.19

結論

Dokcer-composeでNginxコンテナとWebアプリケーションを起動する。

詳細

$tree -L 2
.
├── Dockerfile
├── README.md
├── app
│   ├── Dockerfile
│   ├── node_modules
│   ├── package-lock.json
│   ├── package.json
│   └── server.js
├── docker-compose.yaml
└── nginx.conf

Docker-compose.yaml

services:
  nginx:
    image: nginx:alpine
    ports:
      - 80:80
    restart: always
    volumes: 
      - ./nginx.conf:/etc/nginx/nginx.conf

  web:
    depends_on:
      - nginx
    image: app
    restart: always
    container_name: web
    ports: 
      - 8080:8080

Dockerfile

FROM nginx:alpine

COPY nginx.conf /etc/nginx/nginx.conf

EXPOSE 80

nginx.conf

events {}
http {
  server { 
    listen 80;
    server_name localhost;
    location / {
      proxy_pass      http://web:8080;
      proxy_set_header  X-Forwarded-Host    $host;
    }
  }
}

app

app/Dockerfile

FROM node

WORKDIR /usr/src/app

COPY package*.json ./

RUN npm install

COPY . .

EXPOSE 8080
CMD [ "npm", "start" ]

app/package.json

{
  "name": "docker_web_app",
  "version": "1.0.0",
  "description": "Node.js on Docker",
  "author": "First Last <first.last@example.com>",
  "main": "server.js",
  "scripts": {
    "start": "node server.js"
  },
  "dependencies": {
    "express": "^4.16.1"
  }
}

app/server.js

'use strict';

const express = require('express');

const PORT = 8080;
const HOST = '0.0.0.0';

const app = express();
app.get('/', (req, res) => {
  res.json(req.headers)
});

app.listen(PORT, HOST);
console.log(`Running on http://${HOST}:${PORT}`);

動作確認

$docker-compose up -d
$curl localhost
{"x-forwarded-host":"localhost","host":"web:8080","connection":"close","user-agent":"curl/7.54.0","accept":"*/*"}

HTTPヘッダが渡ってくることが確認できた。

Next.jsでhealth checkを実装する

概要

Next.jsでhealth checkを実装する。
k8s上で動かすという要件を想定する。

下記exampleを利用する。 https://github.com/vercel/next.js/tree/canary/examples/with-docker

環境

Next.js v10.0.1
Node.js v14.15.0
NPM v6.14.8

結論

API Routesを使う

API Routes: Introduction | Next.js

方法1

API Routesを使う

$mkdir pages/_
$touch pages/_/healthz.js
$tree pages/
pages/
├── api
│   └── _
│       └── healthz.js
└── index.js

healthz.js

export default function handler(req, res) {
  res.statusCode = 200;
  res.setHeader("Content-Type", "application/json");
  res.end(JSON.stringify({ status: "ok" }));
}

コンテナのbuildと起動

$docker build -t next-app .

$docker run --rm -it \
  -p 3000:3000 \
  next-app
$curl localhost:3000/api/_/healthz
{"status":"ok"}

f:id:mMQnaZ7vL2DWkoU:20201111223742p:plain
ブラウザアクセス

方法2

pageを作る

下記がヒットしたので試す。
reactjs - How to set up an endpoint for Health check on Next.js? - Stack Overflow

ディレクトリ構成

$tree pages/
pages/
├── api
├── index.js
└── ping
    └── index.js
// health check URL
function Ping() {}

// This gets called on every request
export async function getServerSideProps(context) {
  context.res.headers["content-type"] = "json";
  context.res.end("pong");
  return { props: {} };
}

export default Ping;

コンテナのbuildと起動

$docker build -t next-app .

$docker run --rm -it \
  -p 3000:3000 \
  next-app
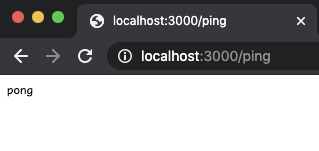
$curl localhost:3000/ping
pong

f:id:mMQnaZ7vL2DWkoU:20201111225649p:plain
ブラウザアクセス

まとめ

ビルドの結果API Routesはフロントエンドのバンドルサイズに影響を与えない事がわかる。

They are server-side only bundles and won’t increase your client-side bundle size.

https://nextjs.org/docs/api-routes/introduction
liveness probeとrediness probe用のpageを追加しても微々たる差なので気にしなくても良い。
ただ本来の使い方を考慮するとAPI Routesで実装したほうが良いだろう。

$npm run build
Page                                                           Size     First Load JS
┌ ○ /                                                          327 B          60.4 kB
├ ○ /404                                                       3.44 kB        63.6 kB
├ λ /api/_/healthz                                             0 B            60.1 kB
└ λ /ping                                                      211 B          60.3 kB